

Opening an HP A2941A 600 VA PowerTrust UPS
I finally took the time to replace the batteries in my PowerTrust that I use
for a UPS on my HP918, and other things. Below are a few pictures that may help
others, if they feel the need to do the same. I paid $25 US Dollars per battery
at Batteries Plus, 23 March 2011.
- PowerTrust front view
- PowerTrust side view
- PowerTrust back view
- PowerTrust front panel rear
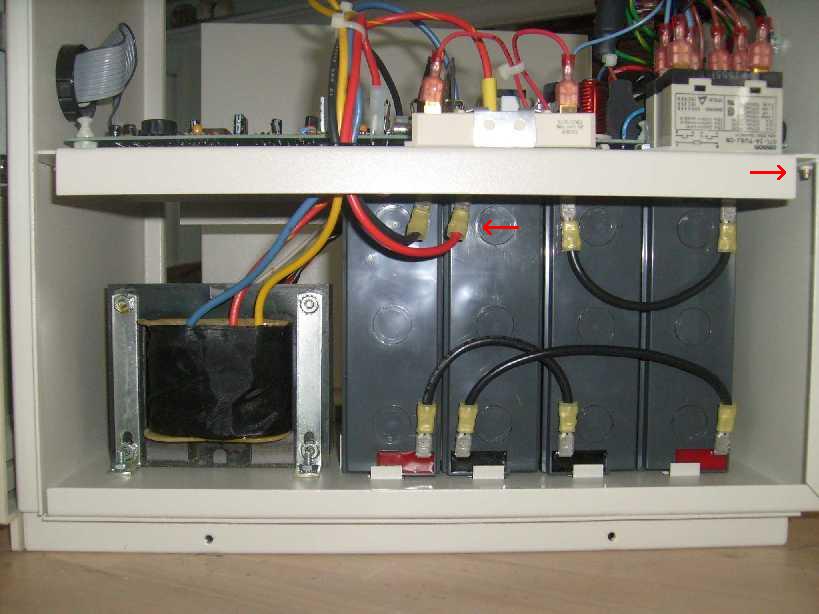
- PowerTrust front internal
- PowerTrust internal side view
- PowerTrust rear wiring tray
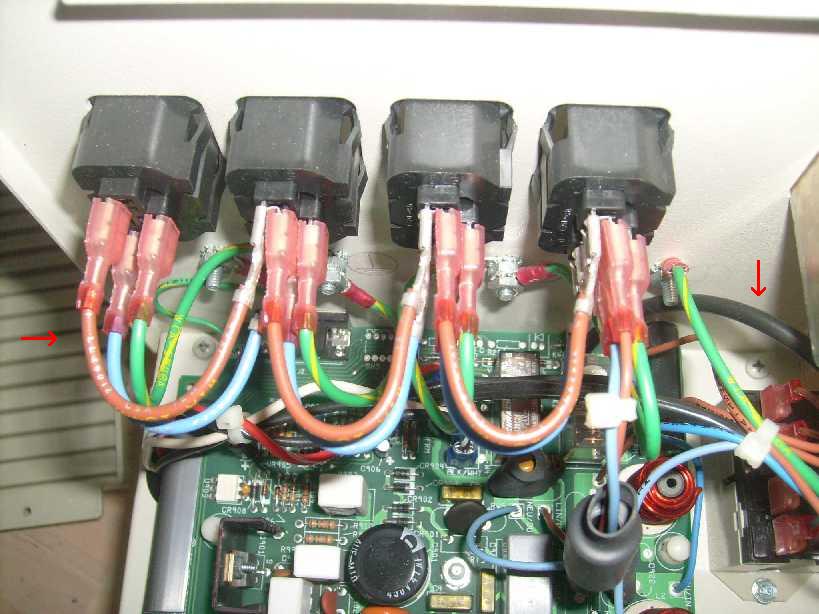
- PowerTrust power connectors
- PowerTrust exposed batteries
- PowerTrust Battery Block

Note the 2 screws at the bottom. These attach the front panel; not the case.
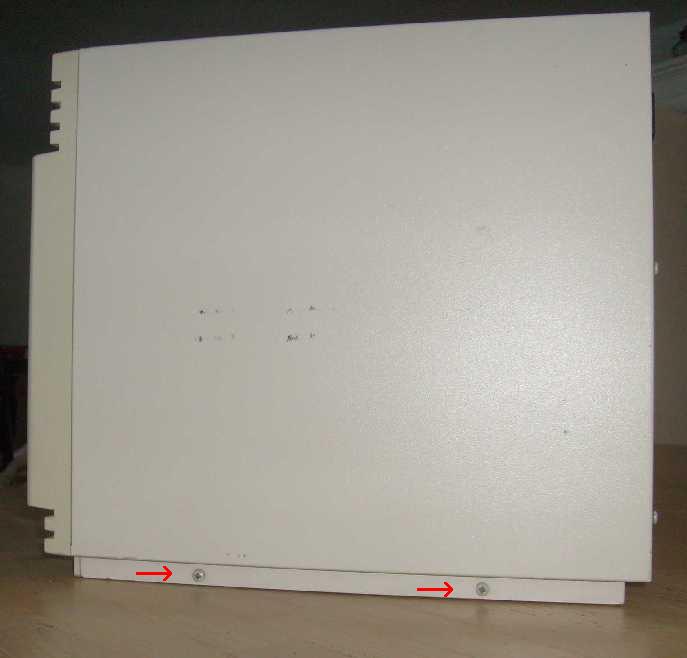
Note the 2 screws at the bottom, and how the casing indents on the bottom.
Its the same on the other side.
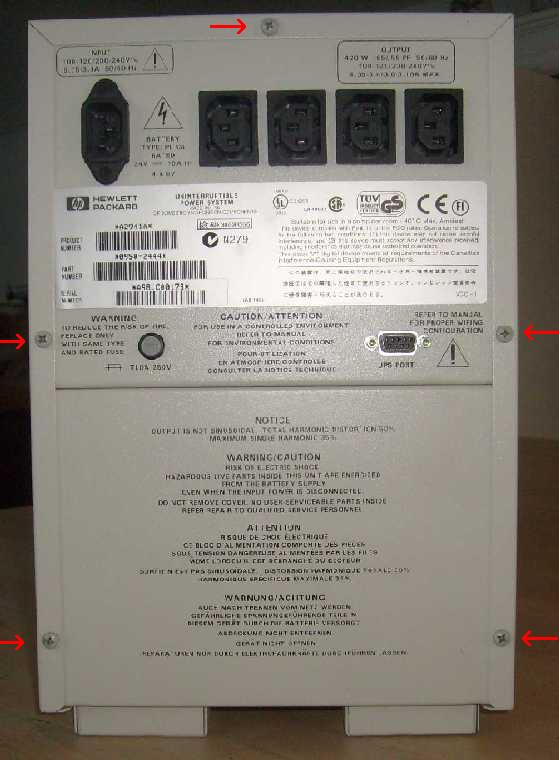
Note the 5 screws in the case.
Remove the 5 rear screws, the 4 side screws, and the 2 front screws.
Pull bottom indented case sides appart and work the case back half an inch,
and finally remove it.
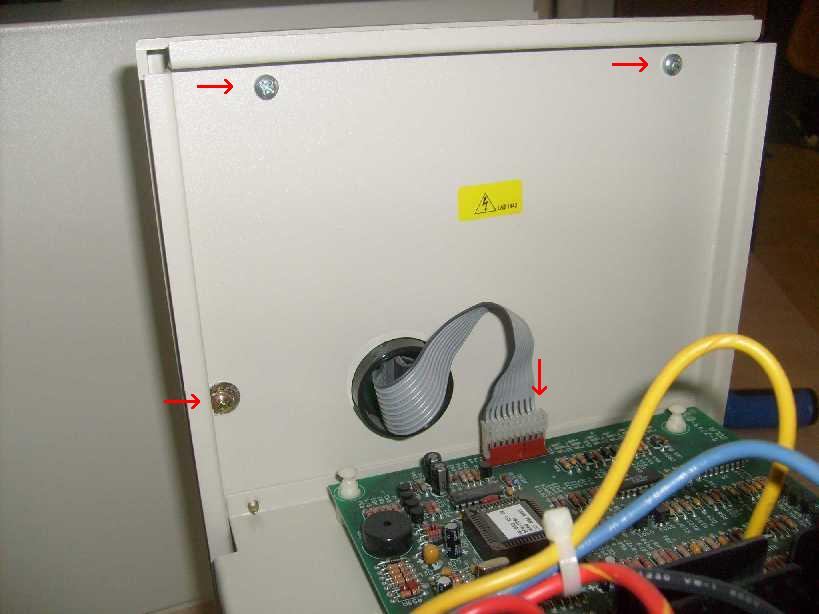
Note the 3 screws holding the front panel.
Note the data ribbon and its orientation (ribbon side of plug is near the case
side).
Remove the 3 front panel screws and unplug the data ribbon. Push the ribbon
through the ribbon hole and set the front panel down.
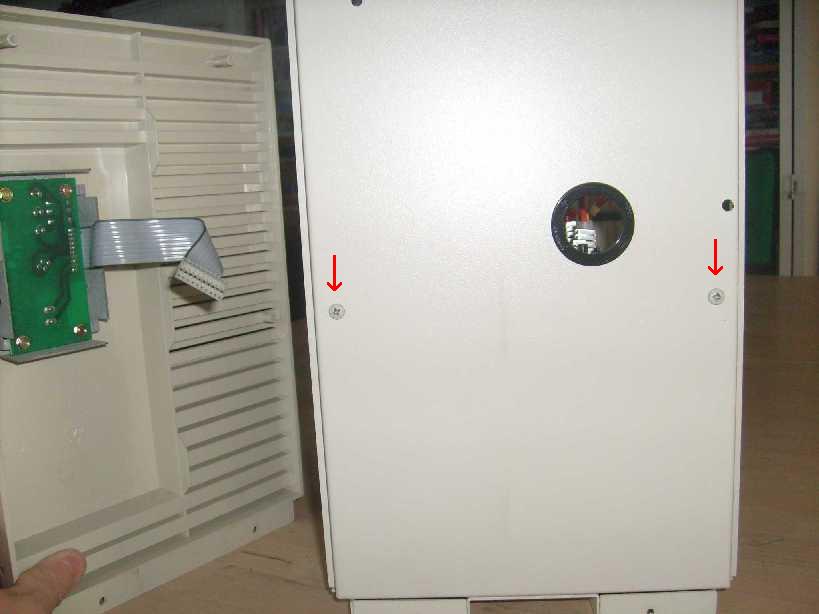
Note the 2 wiring tray mounting screws.
Note the rear wiring tray mounting screws.
Note the battery connectors and how they connect between batteries (connected
in series).
Again note the rear wiring tray mounting screws.
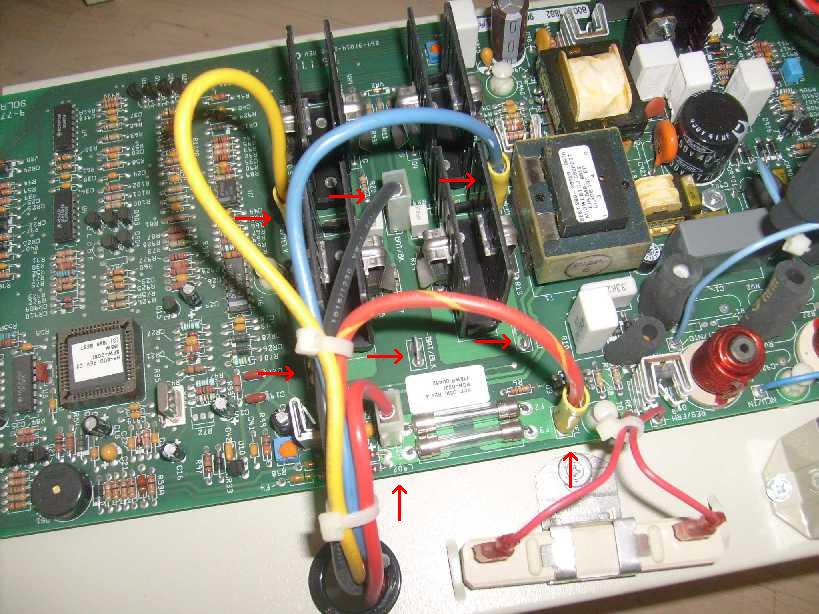
Note the 5 power connectors.
The labels on the breadboard say Yel, Red, Blk, Blu. The Yellow, Black, and
Blue tabs appear twice on the breadboard.
When I put it back together, I didn't notice all this before.
I placed my Black connector on the other black tab, near the red one.
But it seems to work fine (yes, I tried the test button when my system
was back up).
Unplug the 5 power connectors and push the wires through the hole in the
wiring tray.
Unplug the 2 power connectors that go to the battery block.
Remove the 2 front wiring tray mounting screws.
Remove the 2 rear wiring tray mounting screws.
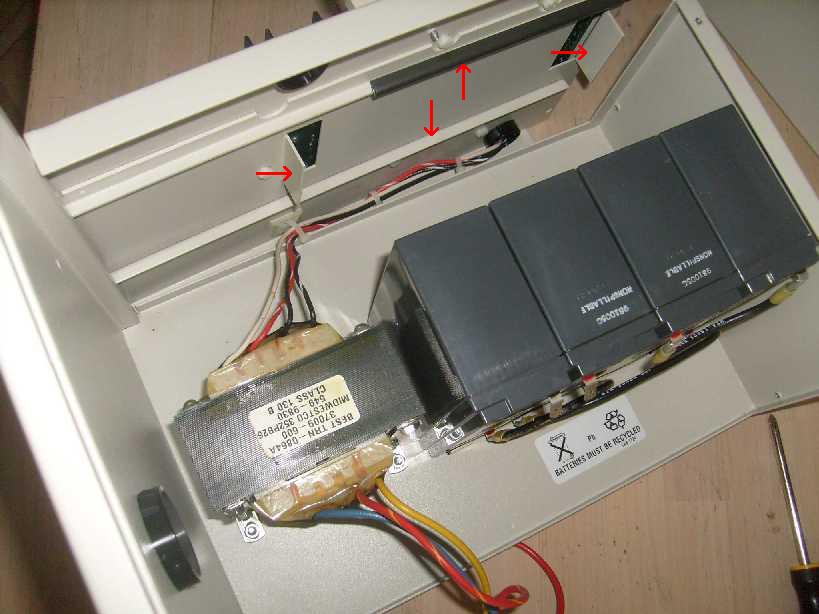
Note the wiring tray bottom tabs that surround the battery block.
Work the wiring tray up and off of the battery block and lay it on the side.
It may be somewhat tight because of the transformer wires that we avoided
to detach.
Remove the battery block.
The batteries are held together by what appears to be 2-sided sticky tape.
I used velcro sticky-back squares for my new batteries.
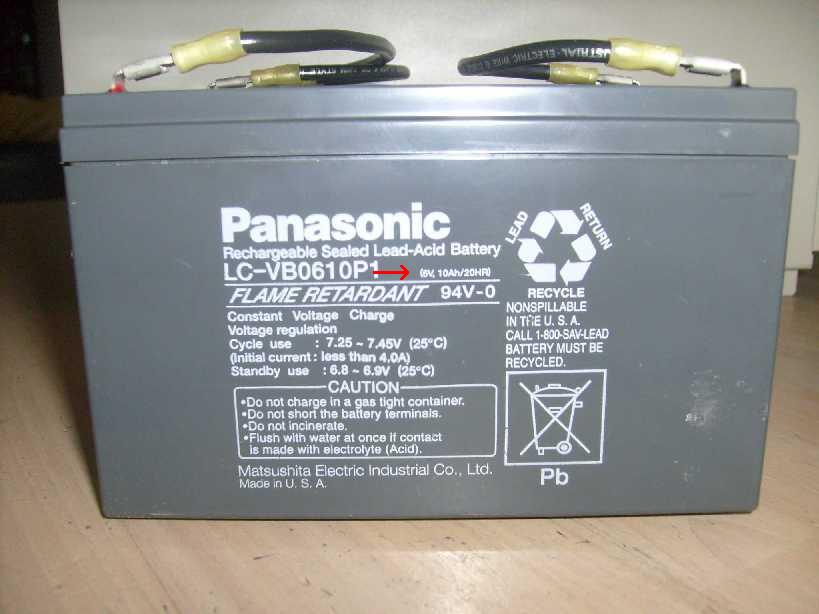
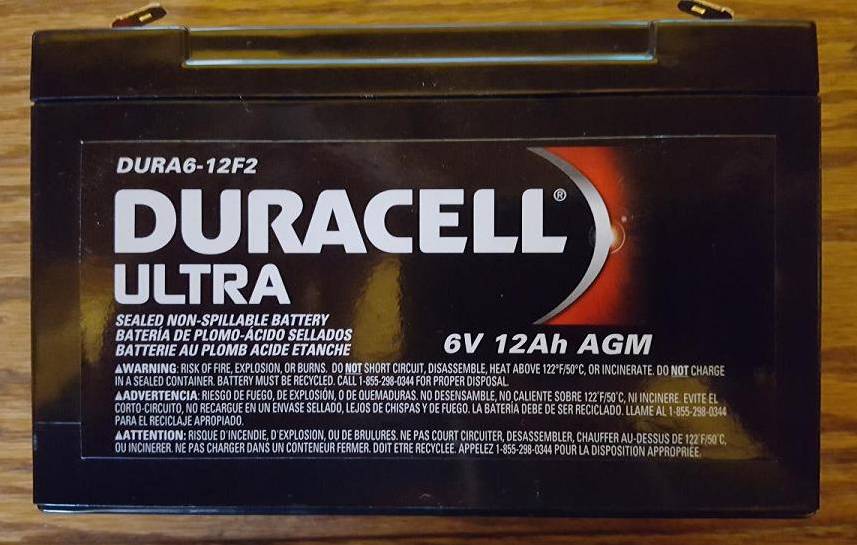
Note the type of battery: 6V 10ah. Batteries Plus had the similar battery,
6V 12ah. DURA6-12F2 DURACELL ULTRA 6V 12Ah AGM
17-Nov-2016 Replaced both PowerTrusts; did not use sticky tape this time.
DURA6-12F2 DURACELL ULTRA 6V 12Ah AGM
(Top)
3kRanger Home
3kRanger Mail
CheckIP
Updated: