QCShow Player
|
| • |
|
| • |
|
| • |
|
Create Your Own Presentations
|
| • |
|
| • |
|
| • |
|
| • |
|
Examples
|
| • |
|
Technical Notes
|
| • |
|
| • |
|
Support
|
| • |
|
|
|
How to Build Your Own Authoring Tool
If money is very tight – or you are simply curious – you can create your
own presentations manually rather than purchasing the commercially
available authoring tool, QCShow Author. The QCShow
process has been purposefully designed to be as simple as possible. At
its worst, creating your own presentations is only tedious, but it's
never complicated.
Because the QCShow Player is distributed freely, there's little
incentive to duplicate that effort, although that's clearly possible
too. Nonetheless, the explanation here will focus only on creating a
QCShow-compatible lecture.
There are only three parts to assembling a QCShow lecture:
- creating a series of 800 x 600 images, which will be your slides,
using any method you care to use, including drawing the images on paper
and scanning them individually.
- recording a narration sound file and breaking it into
segments, one for each of the slides above, and then compressing each of
the audio segments using the Ogg Vorbis compression method.
- writing an appropriate accompanying script file.
We'll talk about each of these steps in detail. But before we begin, we
will need to create the necessary folder structure. For the examples to
follow, we'll presume that your presentation is about your last
vacation.
Fig. 1. The necessary folder structure.
First create a generic outer folder, perhaps called "presentations," as
shown in Fig. 1, where you'll put each of your individual slideshows.
Inside that folder, create another folder, perhaps called
"our-vacation", for this one presentation. And inside that folder,
create a third folder called "resources." The "resources" folder is the
only one whose name is not optional.
Step One: Creating the Slide Images
Your slides may be created in any number of ways. The only constant is
that, in the end, they must be 800 x 600 JPEG, GIF or BMP-encoded
images. 800 x 600 is the only screen resolution that QCShow uses,
thus they must meet this one criterion.
Two examples of such images are shown below, using the two
compression methods, GIF and JPEG.
Three different ways of creating your slides are also shown: (i)
hand-drawing your slides, (ii) simply using photographs and (iii) using a
commercial authoring tool such as PowerPoint.
Fig. 2. A scanned image in GIF format.
One very simple way to author your slides is to draw them by hand on a
piece of paper and scan the pages. Quite similarly, you might use a word
processing program to create your slides as a series of pages and then
print and scan them.
If your image is primarily a line drawing, composed of only a few
discrete colors, as occurs in Figure 2, you will find that GIF encodings
are your best option. The GIF algorithm, which until recently was
patented by Unisys but is now public domain worldwide, uses a 256-color
palette. If your image contains more colors than 256, the algorithm will
determine the 256 most commonly used colors and map all of the
remaining colors onto the closest colors in that palette. This process
can leave a continuous-tone image, such as photograph, looking splotchy
or peppery, thus you don't want to use it for such use.
But if the color palette used in an image is less than 256 colors and
the drawing is primarily line art, GIF has the advantage that its
compression mechanism is lossless (i.e., you get back exactly the same
image as you put in when decompressed).
The image in Figure 2 may actually have more than 256 colors, but you
would never notice it. The few colors that are used are bold and the
gradations of color within a pen stroke are close enough so that
substitutions to the nearest color in the palette appear quite normal.
The compression algorithm used in GIF encodings, LZW,
works much the same way as a fax machine's compression algorithm
operates: it "likes" large areas that are all the same color. When these
structures occur in a GIF-encoded image, the compression ratios that
can be achieved using GIF can be quite impressive. On the other hand,
GIF does not work well if each pixel is a slightly different color. The
resulting encodings are often quite bulky and are almost always inferior
to JPEG.
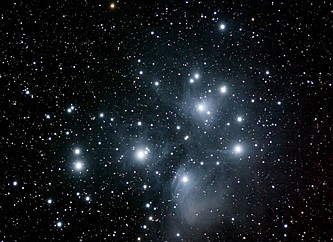
Fig. 3. A photographic image in JPEG format.
A second way to create your slides is simply to use pre-existing
photographs. The primary constraint in doing this is that your
photographs must be in horizontal (landscape) format.
In those situations where GIF-encodings tend to fail (continuous tone
images with large color palettes), JPEG encodings work quite well. The
JPEG algorithm is built around a two-dimensional spatial Fourier
analysis. What this means in practical terms is that a series of rolling
waves are applied to the image in order to determine how the "signal"
on the image changes as you travel across the image left-to-right and
top-to-bottom.
Images encoded with JPEG tend not to have sharp edges. Rather the JPEG
algorithm works best when the color changes in a slow, predictable
manner. Fortunately, photographs have this attribute. They are
characterized by relatively smooth changes in color and brightness from
one nearby area to the next.
JPEG images are inherently "lossy." Some of the information of the
original photograph will be lost on decoding, but there is a parameter
to the encoding JPEG algorithm called quality. Most normally, the
quality level is set to 75. This will produce an image that is
difficult on casual observation to tell from the original but also
results in a relatively high compression ratio. In the commercial
authoring tool, QCShow Author, the quality is fixed at 90. This
results in significantly better images when decompressed, but also in
image files that are larger than normal.
You are free to select whatever JPEG quality level you choose to use,
but remember: higher quality images come at the price of higher
bandwidth requirements in your presentation. In contrast, lower quality
settings result in images that are fuzzier and more poorly represent
text.

Fig. 4. A PowerPoint slide in JPEG format.
What about writing text onto your slides? If you're not going to
manually draw and scan your slides, you're going to need some sort of
electronic authoring tool. PowerPoint is the most common method
to do this. It is powerful and flexible, allowing you to generate truly
attractive slides with little effort. You are however by no means
limited to using PowerPoint. Other alternatives are word
processing and desktop publishing programs, particularly if you can
output your slides as PDF files.
[Note: Microsoft's Paint program, which is freely
distributed with every copy of Windows can also be used to write text
onto images, but it is much more difficult to use than PowerPoint
and does not encode images in JPEG or GIF particularly well. If you are
going to use Paint,
it is our recommendation that you only save your images in BMP format
and transform them later in JPEG or GIF using some other process.]
Transferring the PowerPoint (or other similar method's) slides is
a simple three-step process. Before you begin, however, launch your
favorite image processing program (Lview Pro, etc.) and your
authoring tool (PowerPoint, etc.) so that both are running:
- Set your PC's screen resolution to 800 x 600 and put
PowerPoint into its slideshow mode. Press PRNT SCRN
to save the slide's image into your PC's clipboard.
- Once you've done this, ALT+TAB to your image processing
program and paste the clipboard image into the program. Save the image
as a JPEG file, with a quality level 75-90, or as a GIF file, whichever
is most appropriate for the type of image, in the "resources" folder you
created earlier. Name each slide in some organized fashion for later
use in the script, such as:
our-vacation001.jpg
our-vacation002.jpg
our-vacation003.gif
our-vacation004.jpg
•
•
•
- ALT+TAB back to the authoring program, advance the slide, and
repeat Steps 1 and 2 until you have recorded all of your slides.
At this point, you're essentially done with the creation of the slides.
One final note on encoding images. If you're not planning on
distributing your presentation over the internet, but rather intending
on using a CD or DVD, you can encode your images in BMP (bitmap)-format.
BMP-encoded images have the advantage that they are lossless. They are
an exact representation of the image you see on the screen, but they
tend to be 10-20 times larger than either GIF or JPEG-encoded files.
Step Two: Creating the Sound Files
QCShow player recognizes two forms of audio encodings:
OGG and WAV. Allow me to explain the difference between the two.
WAV-encoded files are simply PCM (pulse-code modulated) data with a
short header appended to the beginning of the file describing the
conditions under which the audio track was recorded.
PCM-encoding is the simplest form of audio digital recording, but it is
also the most accurate. An example of the process is shown here:
Fig. 5. An original continuous tone wave.
Fig. 6. The same wave digitized into discrete (PCM)
steps, although in an exaggerated fashion.
Ogg Vorbis, in contrast, is a much more elaborate encoding
mechanism. Rather than digitize a signal as it progresses through time,
it analyzes the frequency distribution of the signal as it passes
through a series of successive frames. Ogg Vorbis achieves its
high rate of compression by picking out only the most noticeable
frequencies in each frame and dispensing with the rest. It's simply the
nature of human ear that you don't miss their absence.
In either case, a PCM-encoded file is the basis for an Ogg Vorbis-encoding.
You first record your audio file using a standard WAV recorder and then
subsequently convert it to OGG. In the process, you compress your audio
files by 5 to 10 times, making them much more acceptable for
transmission over the internet.
Ogg Vorbis is a patent-free, open-source project. Encoding WAV
files in the OGG format is quite easily done. You can download an
encoder from:
Ogg Vorbis download point
In Windows, Ogg Vorbis runs under MS-DOS. If the encoder program,
oggenc.exe, and the wave file you wish to compress are in the same
folder, you would type a command like this:
oggenc our-vacation001.wav
That's all there is to the process. A OGG-encoded file named
"our-vacation001.ogg" will have been created as a result. However, let
us recommend a lower quality level than the OGG encoder selects by
default. Type this command in place of the first:
oggenc our-vacation001.wav -q -1
This second command uses a quality setting of -1, which perhaps sounds
like you might not want to use it, but the difference in decoded sound
quality will hardly be noticeable. The size of the encoded file will
however be half that of the default setting.
Although no version of Windows' audio tools supports the Ogg Vorbis
format, you can download Winamp, a free audio player, if you wish
to listen to your encoded files as soon as you create them. OGG is one
of Winamp's supported formats:
Winamp download point
Recording the Audio File
A great part of the reason for purchasing the commercial authoring tool,
QCShow Author, is to obtain its elegant sound editing & slide
synchronizing capabilities. QCShow Author
was designed to record, edit and parse the indefinitely long audio
tracks that are characteristic of scientific lectures, training
sessions, business presentations and sales talks.
Such lectures are generally recorded live, with all of the ups and downs
of a live presentation. Every live talk is filled with sneezes, coughs,
long stretches of dead time and the inevitable uh's and um's, all of
which should be deleted from the final presentation. Similarly, every
live talk tends to have a few spurious comments, such as "These aren't
my slides," "Can we have the room lights down?", "How much time do I
have left?", etc. Eliminating this material makes the final presentation
surprisingly more professional, creating a lecture that is much more
enjoyable to listen to.
However, writing an editor to eliminate this spurious material from a
continuous recording and then subsequently breaking the audio file into
its necessary constituents, one audio segment per slide, requires a
great deal of programming effort. Fortunately, however, there is a free
alternative, one that will cost you almost nothing in time to implement.
The trick is simple enough. Record the narration for each slide as an
individual sound file. SoundRecorder
is a Microsoft product that has been included with every copy of
Windows since Windows 95 and NT, and it will work admirably for this
purpose.
Fig. 7. Microsoft's SoundRecorder.
A good part of making this process work lies in first writing out your
narration as a series of text blocks, something like this:
Slide 1 --------------------
This is sample text that would express the things you wished to say
about the first slide. Although the text can go on for as long as you
like, generally a single slide's narration should last somewhere between
30 seconds and three minutes in order to keep your audience's
attention.
Slide 2 --------------------
This is sample text that would express the things you wished to say
about the second slide. Although the text can go on for as long as you
like, generally a single slide's narration should last somewhere between
30 seconds and three minutes in order to keep your audience's
attention.
Slide 3 --------------------
This is sample text that would express the things you wished to say
about the third slide. Although the text can go on for as long as you
like, generally a single slide's narration should last somewhere between
30 seconds and three minutes in order to keep your audience's
attention.
...and then recording each block separately.
The advantages of doing this are severalfold, but the most significant
is that text narrated in these short segments doesn't require much
editing. If you flub a segment, you can simply record it over again
until you get right.
Using Microsoft's SoundRecorder
SoundRecorder possesses very little editing capabilities, but it
does allow you the capacity to trim off dead space at the beginnings and
ends of files easily, and you will find that capability useful. But
there are some tricks to using the SoundRecorder program. The most
severe limitation to SoundRecorder is that in its default mode
it can record only 60 seconds worth of narration.
This limitation can be overcome by performing the following steps:
- Under the file menu, select the Properties option. Using the
Convert button, set the recorder to 16,000 Hz, 16 bits, mono.
Press OK twice to return to the recorder.
- Record a full minute of silence, with no sound input.
- Save the 60 second silent file as "dummy.wav"
- Under the Edit/Insert File... menu, insert the "dummy.wav"
file anywhere in the 60-second segment. Doing this, you'll notice that
the registered file length is now 120 seconds instead of the
previous 60 second default.
- Repeat the previous step three more times, so that the file
length grows to 300 seconds (five minutes). This time limit should be
more than long enough for any single slide's narration.
- Save the new 300 second file as "dummy.wav"
Prior to recording each slide, load the "dummy.wav" file. Doing this not
only sets the maximum record time to 300 seconds, it also resets the
recorder to the 16,000 Hz, 16 bits, mono settings.
After recording the text for each slide to your satisfaction, trim the
dead time off the beginning and end of the narration, leaving a few
tenths of seconds of quiet time at each end, and save your files into
the "resources" folder in an organized fashion, such as:
our-vacation001.wav
our-vacation002.wav
our-vacation003.wav
our-vacation004.wav
•
•
•
...so as to match your slides above.
All that remains now is to write a backbone script that will direct
the QCShow Player to play your presentation.
Step Three: Writing the Script
The QCShow script structure is explained in detail in
How QCShow Works.
Let me encourage you to read that page carefully before proceeding.
The script has three major divisions, the first of which we'll ignore:
- The Info Section, which is specified by the
"%info" and "%endinfo"
markers, provides details about the lecture. The inclusion of this
section is optional and we'll ignore it here for simplicity's sake.
- The Resource Section, specified by the "%resource"
and "%endresource" markers, outlines the complete
list of sound and image files that will be required by the
current lecture. This section also specifies the URL of the
remote server where these files may be downloaded if they are not
already locally present.
- The Slides Specification Section, specified by the
"%slide" and "%endslide"
markers, lists the components necessary to draw each individual
slide and how the slide is to be assembled. In the simple script
example shown above, one full-screen image and one sound slice
comprises each slide.
Writing the script is not difficult. Each line is very much like
another, and with a little cut-and-paste, you can assemble it quite
quickly.
Although the script below is imaginary, yours will look something very
much like this one. Using any text editor you wish, create a script
similar to this:
==========================================
%resource
/resource {our-vacation001.jpg [71898] our-vacation001.ogg [18811]}
/resource {our-vacation002.jpg [91392] our-vacation002.ogg [77838]}
/resource {our-vacation003.jpg [51160] our-vacation003.ogg [82915]}
/resource {our-vacation004.jpg [132201] our-vacation004.ogg [126728]}
/resource {our-vacation005.jpg [54038] our-vacation005.ogg [64412]}
/resource {our-vacation006.jpg [180114] our-vacation006.ogg [63392]}
/resource {our-vacation007.jpg [138848] our-vacation007.ogg [88644]}
/resource {our-vacation008.jpg [77415] our-vacation008.ogg [42291]}
/resource {our-vacation009.jpg [74382] our-vacation009.ogg [176096]}
/resource {our-vacation010.jpg [46386] our-vacation010.ogg [138152]}
/resource {our-vacation011.jpg [58442] our-vacation011.ogg [87365]}
/resource {our-vacation012.jpg [126423] our-vacation012.ogg [201968]}
/resource {our-vacation013.jpg [152650] our-vacation013.ogg [91239]}
/resource {our-vacation014.jpg [115436] our-vacation014.ogg [173416]}
/resource {our-vacation015.jpg [125701] our-vacation015.ogg [80501]}
/resource {our-vacation016.jpg [134063] our-vacation016.ogg [173636]}
/resource {our-vacation017.jpg [70116] our-vacation017.ogg [366280]}
/resource {our-vacation018.jpg [126423] our-vacation018.ogg [60778]}
/resource {our-vacation019.jpg [54038] our-vacation019.ogg [73550]}
/resource {our-vacation020.jpg [71229] our-vacation020.ogg [234340]}
/resource {our-vacation021.jpg [93866] our-vacation021.ogg [23534]}
/resource {our-vacation022.jpg [152085] our-vacation022.ogg [28045]}
/resource {our-vacation023.jpg [72457] our-vacation023.ogg [73711]}
/resource {our-vacation024.jpg [83248] our-vacation024.ogg [41770]}
/resource {our-vacation025.jpg [79170] our-vacation025.ogg [28677]}
/resource {our-vacation026.jpg [77415] our-vacation026.ogg [23598]}
/resource {our-vacation027.jpg [69462] our-vacation027.ogg [88888]}
/resource {our-vacation028.jpg [58731] our-vacation028.ogg [182034]}
/resource {our-vacation029.jpg [52810] our-vacation029.ogg [115375]}
/resource {our-vacation030.jpg [66229] our-vacation030.ogg [54237]}
/resource {our-vacation031.jpg [65091] our-vacation031.ogg [97519]}
/resource {our-vacation032.jpg [101090] our-vacation032.ogg [95421]}
/resource {our-vacation033.jpg [122403] our-vacation033.ogg [50452]}
/resource {our-vacation034.jpg [75653] our-vacation034.ogg [180235]}
/resource {our-vacation035.jpg [127430] our-vacation035.ogg [158243]}
/resource {our-vacation036.jpg [127381] our-vacation036.ogg [191005]}
/resourceserver {http://mywebpage.com/qcshow/our-vacation/resources/}
%endresource
==========================================
%slide
/play {our-vacation001.ogg}
/image {0 0 our-vacation001.jpg}
%endslide
==========================================
%slide
/play {our-vacation002.ogg}
/image {0 0 our-vacation002.jpg}
%endslide
==========================================
%slide
/play {our-vacation003.ogg}
/image {0 0 our-vacation003.jpg}
%endslide
==========================================
%slide
/play {our-vacation004.ogg}
/image {0 0 our-vacation004.jpg}
%endslide
==========================================
%slide
/play {our-vacation005.ogg}
/image {0 0 our-vacation005.jpg}
%endslide
==========================================
•
•
•
•
==========================================
%slide
/play {our-vacation034.ogg}
/image {0 0 our-vacation034.jpg}
%endslide
==========================================
%slide
/play {our-vacation035.ogg}
/image {0 0 our-vacation035.jpg}
%endslide
==========================================
%slide
/play {our-vacation036.ogg}
/image {0 0 our-vacation036.jpg}
%endslide
==========================================
[Note: If you intend on distributing your presentation only by CD,
you still must enter a server address in the %resource
section of the script, even if only a dummy name. The "/resourceserver"
verb delineates the end of the resources list.]
Save the script file in your presentation folder, with a ".qcshow" file
extension, at the same level as the "resources" folder:
Fig. 8. The necessary folder structure.
Congratulations. You're done (almost). Double-click on the script
file to watch your presentation. If there's anything you don't like,
you can redo the particular sound or image files and substitute the new
versions for the old in the "resources" folder.
Fig. 9. The necessary folder structure, with thumbnails.
After you've run your presentation through the Player once, you'll
notice that the Player
has built a new folder in your presentation, "thumbnails." This
folder's presence is absolutely necessary if you intend on distributing
your presentation using CD's or DVD's, media that can't be written to
once it's been formatted.
Should you find anything significant to change about your presentation,
delete the thumbnails folder and let the player rebuild it for you after
you've made your changes.
Every presentation that you create will have this same structure: (i) an
outer folder, named with some descriptive name, (ii) an interior
"resources" and "thumbnails" folder, and (iii) a ".qcshow" script file
placed at the same directory level as the "resources" folder.
Step Four: Distributing Your Presentation
The two most probable ways that you'll use to distribute your
presentations will be either by CD or the internet. Both are quite
simple to implement.
Creating CDs
Once you have constructed the folder structure that you see in Figure 9
and you've throughly checked out your presentation, all you need do is
copy the outer folder ("our-vacation") to your CD.
Perhaps the only thing that you might want to do in addition is create a
link (a "shortcut") to your script files that would reside at the top
level of your CD, making the navigation of the CD a little easier for
your users.
[Note: Because file space is not as great a concern on a CD, you
can record your narrations at high frequency and in stereo, if you wish,
and leave the audio file in an uncompressed WAV format. Similarly, you
can record your images in the lossless BMP format. QCShow Player
will work perfectly well in these modes. But if you intend on
transmitting your presentations over the internet, you will find these
uncompressed encodings completely unacceptable. For the internet
environment, you'll want to make your sound and image files as small as
possible, without significantly compromising quality.]
Using a Web Server
Creating the conditions to distribute your presentations via the web is
very similar to burning a CD. FTP the outer folder ("our vacation") and
all of its contents to a location of your choosing, perhaps in a
directory called "qcshow", on your web server. This location would then
become the location that you would specify in %resource
section of your script file for all future downloads, as in this example:
/resourceserver {http://mywebpage.com/qcshow/our-vacation/resources/}
Similarly, the code for the hyperlink to the script file that you put
onto your webpage for your viewers to click would look something like
this:
<center>;
<a href="//mywebpage.com/qcshow/our-vacation/our-vacation.qcshow">Our New Mexico Vacation</a>
</center>
Only the script file and the resources folder need to appear on your
webserver. To minimize bandwidth, QCShow Player does not
download the thumbnails from the remote server, but rather builds them
locally on the client PC.
[Note: you may have deduced from the nature of the links above,
you don't have to put the QCShow
script file and the resources folder on the same server. When a script
file's hyperlink is clicked, the script file is downloaded into
QCShow Player from the webserver. It's only then that the
Player obtains its directions on where to download the necessary
image and sound files, which could easily be on a different server.
This partitioning of behavior may be valuable in those situations where
your primary public web server is either quite busy, file space is
limited or the operating agency charges you for either the space you use
or the amount of material downloaded.]
|