HPlogo HP 9000 Model A-180: User's Manual > Chapter 3 A-Class System Service

A-Class Server Disk Drive Removal and Replacement

» 

Technical documentation

Complete book in PDF

 » Table of Contents

Overview

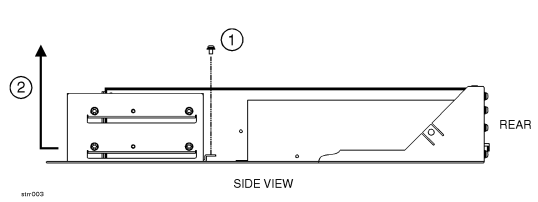
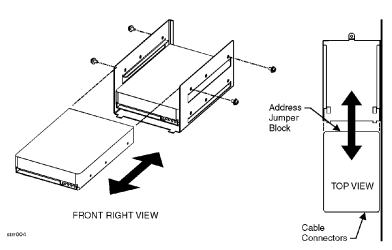
This section provides step-by-step instructions for removing and replacing the Disk Drive Bracket and Disk Drives in the A-Class Server. The following subsections apply:

CAUTION: The procedures in this section require opening the system cabinet and exposing the system to electrostatic discharge. Always observe all electrostatic precautions when working with components inside or out of the cabinet. Failure to follow these precautions may result in component damage or loss of system reliability.

Electrostatic Discharge Precautions

  • Use a grounding mat and an anti-static wrist strap.

  • Wear the anti-static wrist strap to ensure that any accumulated electrostatic charge is discharged from your body to ground.

Before You Do Anything...

  1. Perform system backup.

  2. Shut down the operating system.

  3. Power down the system.

  4. Unplug the server.

    NOTE: Cabinet-mounted servers must be removed from the cabinet before proceeding.
  5. Remove the top of the server by unscrewing the knurled captive screws on each side of the rear of the server. Slide the top back, lift it off, and set it aside.

Disk Drive and Bracket Removal

Remove the Bracket Containing the Disk Drive(s)

  1. Remove the mounting screw that attaches the disk drive bracket to the bottom of the chassis.

  2. Slide the disk drive bracket (containing the disk drives) to the rear until it clears the anchor tabs, lift it out of the chassis, and place on a grounding mat.

Remove the Disk Drive(s)

  1. Disconnect disk drive cables. Observe the following for later reassembly:

    1. Each disk drive power cable connector has rounded top corners that match the power cable receptacle to ensure that the connection is made correctly.Each disk drive ribbon cable connector has a key centered on top that fits into a slot on the data cable receptacle to ensure that the connection is made correctly.

    2. Note the disk drive jumper settings on the front of the drive that you are removing in order to reset the replacement drive to the same jumper configuration.

  2. Remove the screws from the bracket on both sides of the defective disk drive.

    1. If the defective disk drive is on top, either slide the unit out of the bracket or lift it straight up.

    2. If the defective disk drive is on the bottom, slide the unit out of either end of the bracket.

Disk Drive Replacement

CAUTION: DO NOT install a single disk drive on the top rails of the bracket. Always install a single disk drive on the bottom rails. Failure to follow this precaution may cause damage due to excessive vibration.

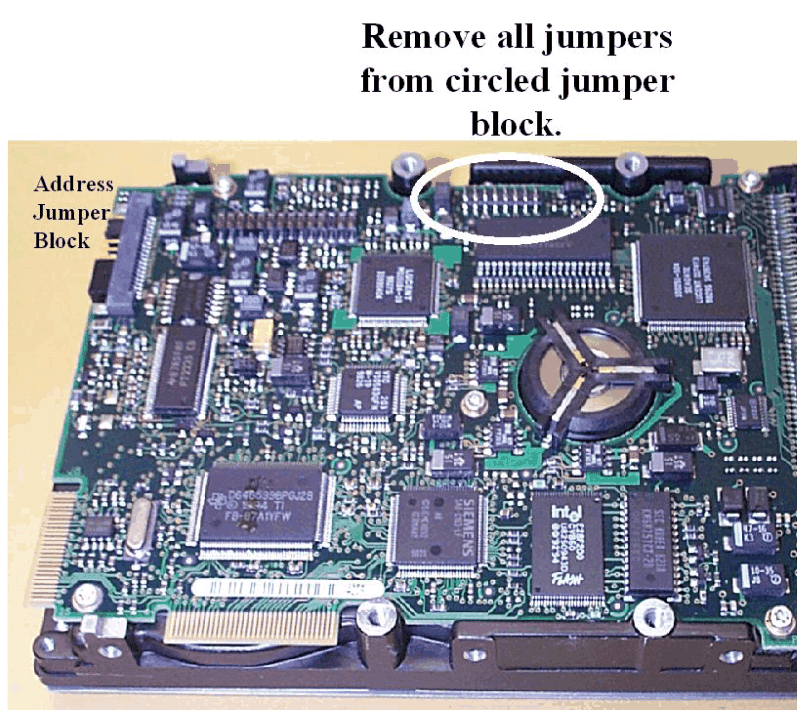
When reinstalling disk drives, ensure that the SCSI IDs are set correctly.

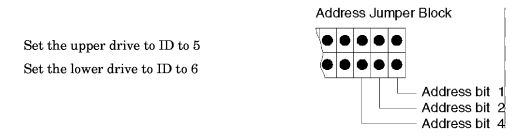
The following illustration shows typical setting of the disk drive ID.

NOTE: This illustration of ID jumper settings is typical. Your drive may be different. Consult the literature and labels on your drive for ID setting instructions.

  • To Re-install the disk drive(s) follow the removal instructions in reverse.

    1. re-cable the disk drive(s),

      CAUTION: Ensure that cables are connected correctly:
      • Match the ribbon cable connector key with the slot on the receptacle.

      • Match the rounded corners of the power cable connector with the rounded corners of the receptacle.

      Failure to observe these precautions may result in bent or broken pins.

    2. remount the disk drive(s) in the bracket, and

    3. reinstall the bracket in the server.

NOTE: Lift either side of the disk bracket to ensure that the tabs on the bracket are seated properly in the slots provided.

The following illustration shows the SCSI address jumper settings for the disk drives.

© Hewlett-Packard Development Company, L.P.