|
|
|
|
HP WDB 5.2 Release Notes: HP 9000 and HP Integrity Systems > Chapter 1 AnnouncementSummary of Changes in Previous Versions of HP WDB |
|
The following features and changes were part of the previous releases of HP WDB for Itanium and PA-RISC architectures:
HP WDB 3.2 enables you to perform command-line calls in a stripped executable. The various scenarios in which you can make command-line calls in a stripped executable are as follows:
HP WDB provides limited support for debugging stripped binaries. HP WDB cannot print the locals and statics declared in a module that has been stripped. HP WDB, however, prints the exported symbols because exported symbols are not stripped by the strip command, they remain in dynsym. HP WDB can access the globals or locals defined in other non-stripped shared libraries loaded into the stripped executable when you are in the appropriate scope. HP WDB places breakpoints using symbol names in the unstripped shared libraries loaded into the stripped executable. In stripped binaries, however, HP WDB cannot insert breakpoints using line numbers or symbolic names of the symbols not in the export list. HP WDB can backtrace properly stripped frames, however, arguments will not be displayed, just as with non -g binaries. For fully archived stripped binaries, PCs, but not function names, will be displayed. A known problem is that HP WDB displays improper function names instead of unknown_procedure for the symbols that are not known. HP WDB versions earlier than 4.2 cannot backtrace through stripped archived binaries. Command-line calls to the non-stripped library work correctly when called while stopped in a stripped binary, or elsewhere. Command-line calls to the functions (exported symbols) in the stripped binary work correctly. HP WDB cannot step into a function that does not contain debug information, nor can you use next to go past a line when there is no debug information. The continue command works correctly. HP WDB cannot display disassembly for fully archived stripped binaries. You can, however, examine the addresses in assembly format with the HP WDB x/i address command:
HP WDB now accepts --pid or -p followed by a process id on the command line. HP WDB makes a slight change in the way it handles command-line arguments. The first non-flag argument is always a program to debug, but the second non-flag argument may either be a core file or a process ID. In earlier versions, HP WDB would attempt to open the second argument as a core file, and if that failed, would issue an error message and then attempt to attach it as a process. Now, if the second argument begins with a non-digit, it will be treated as a core file. If it begins with a digit, HP WDB will attempt to attach it as a process, and if no such process is found, will then attempt to open it as a core file. HP WDB enables you to set permanent breakpoints at the entry and exit (first and final executable statement) of every function that can be debugged. The new breakpoint commands are xbp and xdp.
Here is an example of how to set a breakpoint at the start and end statement of each procedure: (gdb) file a.out HP WDB supports a new functionality for dumping an array into an ASCII file. The array elements are stored in Array format of Matrix Market in a predefined (column-major order for Fortran arrays) order. The objective is to provide a simple mechanism to facilitate the exchange of matrix data and to enable easier parsing of the array elements. For common file formats, see http://math.nist.gov/MatrixMarket/formats.html. To dump an array, ARRAY, to a file named DUMPFILE, use the following command: (gdb) dump2file ARRAY DUMPFILE The entries of ARRAY are dumped into an ASCII file named DUMPFILE in the array format. The file is created in the current working directory. The content of the file has the following format: %%ArrayBrowsing matrix array ARRAY where, ARRAY is the name of the array, and its size is 5x5. The first two lines are comments about this file and the array. The third line denotes the array coordinates. From the fourth line, the elements of the array are listed.
You can use the new --args option to specify command-line arguments for the target program from the HP WDB command line. HP WDB supports “array slicing” for Fortran programs. Array slicing allows you to give a range of elements in place of an array subscript. The syntax is:
Here is an example: For this array: INTEGER*4 A(3,3) The HP WDB command print A(1:2:1, :2) prints these values: A(1,1), A(2,1), A(1,2) and A(2,2) When debugging a multi-threaded application, if you suspect that a specific thread is causing a problem, it is useful to suspend the other threads in the debugger and debug the suspect thread. HP WDB provides commands to disable and enable specific threads.
You can perform stack tracing when the program counter (PC) is corrupted due to a call through bad function pointer. Refer to Debugging with GDB for details on how do memory leak detection. With HP WDB, you can also do memory checking on the attached processes, which was not supported previously.
HP WDB prints Current Frame Marker (CFM) and Previous Frame State (PFS) ar64 registers twice: first as raw values as are other registers and in special formats identifying the size of rotating registers, frame and locals. For example,
The maint info unwind command prints the unwind information for the unwind regions at the given address expression.Usage: maint info unwind exp where exp is an address expression. For example:
When you have a typedef class as a template parameter you can set a breakpoint on a member function by using the command:
This debugger release can show stack traces of mixed Java/C/C++ programs. The stack trace functionality requires Java SDK version 1.3.1.06 or later for HP-UX. Please check the HP web site for Java, http://www.hp.com/go/java/, for availability. The debugger uses the default libjunwind.sl library specified by the JVM. This library is part of the Java SDK version 1.3.1.06 or later for HP-UX. To override the default setting, set the environment variable GDB_JAVA_UNWINDLIB to the path of your libjunwind.sl. The debugger supports these types of Java frames:
For specific details on how to use this feature, refer to the HP web site for Java, http://www.hp.com/go/java/. HP WDB includes these features to support C++ templates:
You can set a breakpoint in template class member functions and template functions by not specifying the type enclosed by angle brackets. For example, if you have a template class named myClass with three instantiations:
To set a breakpoint on the member function bar() you can use the following command and pick from the menu.
HP WDB includes the command, dumpcore, to generate a core image file of a process running under the debugger in the middle of execution. The dumpcore command takes no arguments and saves the core image for the current process being debugged in the file named core.pid, where pid is the process ID number. To analyze this core file with HP WDB on HP-UX B.11.22 or earlier systems, you need to do the following: When starting from HP WDB command line:
When starting from shell prompt:
The info threads command output is different than on WDB 1.4.00: In 1.4.00 the output lines show: 1 system thread 2345 user thread 6 MyFunction () at ... In WDB 1.4.01 the output lines show: 6 system thread 2345 MyFunction () at ... In the WDB 1.4.01 output, the left-most number is the user thread ID, which stays constant throughout the execution of the program. When show-all-kthreads is set to “1”, the info threads command includes threads that have no user threads attached to them. For these threads, the left-most number is a -ve number (-ve system thread ID). HP WDB supports assembly-level debugging of optimized code. If a function is compiled with optimization level 2, the disassembly also displays the actual source line and column information for each assembly instruction. Stack traces show line-number information for optimized functions. You can set breakpoints and single-step at the source statement level for optimized functions. Locals and argument values are not available for optimized functions.
HP WDB provides additional support for programs that use the MxN model for threaded programs on HP-UX B.11.22.
HP C supports a _Complex data type built from any of the floating point types. A _Complex number holds a pair of floating point numbers, the first is the “real part” and the second is the “imaginary part”. Here are examples of declarations and initializations using _Complex numbers:
_Imaginary_I is a keyword which represents the square root of -1. The debugger has limited support for _Complex variables. No arithmetic operations are allowed with _Complex numbers. A _Complex number may be cast or assigned to any numeric data type and vice versa. A _Complex variable can be initialized with an expression of the form: A + B * _Imaginary_I Where A and B are ordinary numeric expressions, perhaps in parentheses. This is also the format in which gdb displays a _Complex value. Complex numbers cannot be used in arithmetic expressions in the debugger. For more information of _Complex type, refer to the HP C/ANSI C documentation. HP WDB for Itanium provides full support for debugging namespaces. You do not need to use fully qualified names to access symbols within a namespace. The debugger can compile a list of namespaces active in the scope that you are in and when possible choose an appropriate symbol. The debugger recognizes using declarations, using directives, namespace aliases, nested namespaces and unqualified lookup within a namespace. It also recognizes using directives, aliases and using declarations within namespaces. When the debugger has a list of possible resolutions for a given symbol, it will display a menu that shows all names fully qualified whenever namespaces are involved. You can choose the appropriate symbol from the list. For example, if you stop the debugger in a function that contains an int i using directive for a namespace such as:
You can use the command print i and if the only possible resolution for i is A::AB::ABC::ABCD::i the debugger prints out the name of the symbol and its value. If, however, a global i exists, the debugger will display a menu from which to choose:
Setting breakpoints on functions works in the same way. The debugger also allows semi-qualified names. For example, if you stop in a function in namespace B, which is nested in namespace A, and namespace A has an int i, you can use print B::i to display the value of A::B::i. To disable namespace support, use the command:
You can debug PA-RISC applications and core files on Itanium-based systems. When you start HP WDB, if the debug target is a PA-RISC binary program, the debugger automatically loads HP WDB 3.0.01. The PA-RISC version of HP WDB is provided as part of the HP-UX Operating System. When a PA-RISC application creates a core file on an Itanium-based system, the file name must be core.program_name, for example, core.myprog. To debug the core file for the PA-RISC application, use the normal HP WDB command, for example:
HP WDB will automatically use the PA-RISC version of the debugger, WDB 3.0.01, and you can debug the core file as you would on a PA-RISC system.
To debug a core file generated by a PA-RISC program on a machine other than the one on which the core file was generated, follow these steps:
To debug a live PA-RISC program on Itanium-based systems, use these steps:
HP WDB for Itanium-based systems includes minimal support for source-level debugging of programs compiled without the -g option at any optimization level. The appropriate debugger commands enable these features on programs compiled without -g:
Local variable and type information, however, will still not be available without compiling with -g. To enable debugging support for programs that have not been compiled with -g, use the set src-no-g command. Here are the options for the command: set src-no-g = none | no_sys_libs | all
To see the current settings, use show src-no-g. HP WDB includes hardware support for watchpoints. You should not set more than four watchpoints to get the best results. Setting a fifth watchpoint causes HP WDB to set a software watchpoint that can slow down in the execution of your program. HP WDB can step into a co-variant function. The compiler-generated function called thunks, which is used internally by the compiler to support co-variant return type, will not be shown when you do a “backtrace” or switch from one frame to another frame. Similarly, using a finish or return command at a co-variant callee function directly returns the control back to the caller of thunks. The Visual Interface for HP WDB terminal user interface (TUI) mode supports a new command, log logfile_name, that saves the content of a session to the specified log file. When you use the log command, the debugger saves a snapshot of the current session, from the start of the session to the point where you issued the log command. Each time you use the log command, HP WDB overwrites the specified log file with a new snapshot from the start of the session. To run the Visual Interface for HP WDB, use the following command:
To redirect HP WDB output to a log file named mylogfile, use the log command in the following manner:
The Visual Interface for HP WDB stores the log file, mylogfile, in the current directory. To view the log file from Visual Interface for HP WDB, start a shell process and use the following command:
Visual Interface for HP WDB includes these changes:
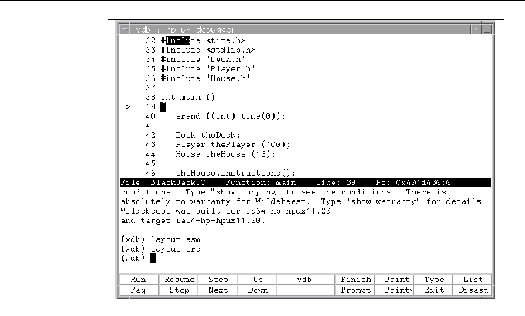
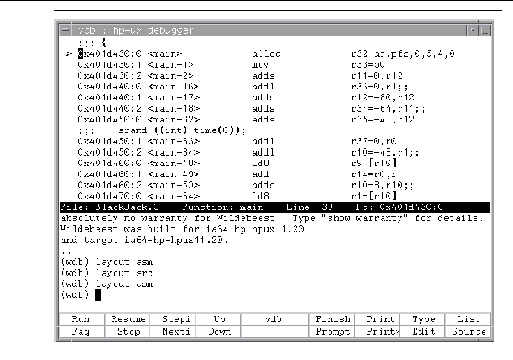
HP WDB uses a new HP-supported user interface with both the graphical and terminal modes. Visual Interface for HP WDB is based on Vim 5.7 and WDB. This interface replaces the -tui mode on Itanium-based systems. To use the interface with HP WDB, type vdb. When you are using the interface, you are actually using vim, which is a vi-compatible editor. With the new interface you can use vi commands to browse in the WDB display. Most of the interface functionality is also available for emacs users and does not require knowledge of vi commands. For details about the interface, refer to the Debugging with GDB guide, which is included with the software. HP WDB provides the following features in addition to the standard GDB features:
Changes in the architecture require that you use slightly different syntax to display the instructions in a memory location or setting a breakpoint to an instruction in a memory address. In the Itanium architecture, the memory address represents the location of a “bundle” of three instructions. Unlike PA-RISC, the Itanium architecture stores three instructions at the memory location, called the bundle address. Each instruction at the bundle address is referenced by a slot number, either 0, 1, or 2. On Itanium-based systems the pc register value does not represent a byte address. It represents a byte address of a bundle plus the slot number of the instruction. For example, if you print the program counter in hex with the print command you would see: (gdb) p /x $pc In the example,
You can use the value just as you would use any other byte address. Other examples of addresses you might see are: These two representations are equivalent:
These two representations are also equivalent:
You need to use the bundle address and slot number format to specify breakpoints at a specific instruction. For example:
This command sets a breakpoint at the second instruction in the bundle at the specified address. The output you would see at the breakpoint is: Breakpoint 6, 0x400a980:1 in Show (this=0x7ffff988) at Hand.C:103 HP aC++ version A.05.01.00 adds support for new industry standard application binary interface (ABI). By default, HP WDB for Itanium-based systems correctly interprets the new ABI format. If you need to debug programs compiled with a version of HP aC++ earlier than A.05.01.00, you must use the command set abi old in HP WDB before loading the file. To debug a core file generated by a program compiled with a version of HP aC++ earlier than A.05.01.00, you must use the -old_abi command-line option when starting HP WDB: gdb a.out core -old_abi To confirm if a program uses the new ABI, use the command: nm a.out | grep " _Z" If the result shows mangled names starting with _Z, the program is a new ABI program. HP WDB includes an HP-supported Visual Interface for HP WDB with both graphical and terminal modes. The interface is based on Vim 5.7 and HP WDB. This interface replaces the -tui mode on Itanium-based systems. When you use the interface you are actually using vim, which is a vi-compatible editor. With the interface you can use vi commands to browse in the WDB display. Most of Visual Interface for HP WDB functionality is also available for emacs users. Visual Interface for HP WDB does not require knowledge of vi commands. Visual Interface for HP WDB identifies you as an emacs user by looking at the environment variable $EDITOR. If this variable has a value that matches emacs, or gmacs, or xemacs, then Visual Interface for HP WDB starts in emacs mode automatically.
If the underlying GDB terminates abnormally when you are using Visual Interface for HP WDB, do not close the Visual Interface for HP WDB window. Wait for a minute or two. Visual Interface for HP WDB captures the stack trace and the debugging session details and sends you an e-mail. You can then forward this to HP when you report the problem. This is helpful to HP in reconstructing the crash scenario. You can use Visual Interface for HP WDB in either of two modes:
Visual Interface for HP WDB accepts the same command-line arguments as GDB so you can add options to the startup command. See the manual page for GDB for the list of arguments.
The Visual Interface for HP WDB screen consists of two areas:
You can use the arrow and pagination keys on the keyboard to move the cursor:
You can click on the softkey or press a function key on your keyboard to invoke the command. The function keys F1 through F8 correspond to the bottom row of softkeys. The function keys f9 and up correspond to the top row. This display show the Disassembly view. To change the foreground and background colors, update the .Xdefaults file in your home directory. The resources are the same as for hpterm. Here is a sample entry:
To start Visual Interface for HP WDB in graphical mode with mouse support, run Visual Interface for HP WDB with the command: /opt/langtools/bin/vdb Visual Interface for HP WDB opens an hpterm window, ignoring the value of the TERM environment variable, for debugging a program. With a mouse you can do the following:
To start Visual Interface for HP WDB in terminal user interface mode, run Visual Interface for HP WDB with the command: /opt/langtools/bin/vdb -tui This mode works well with hpterm and xterm and fairly well with dtterm and vt100 (telnet) terminals.
If you use xterm and dtterm, you should update your .Xdefaults file with keyboard translations to get the shifted arrows and shifted paging keys to work. For xterm use these settings:
For DtTerm use these settings:
Mouse operations are not supported in the -tui mode. Also the paging and shift keys do not work well with vt100 terminals. If you are using the GUI mode:
If you are using -tui mode, use these commands to change the size of the current window:
In Visual Interface for HP WDB, the current window is usually the debugger window. Visual Interface for HP WDB is based on vim, so you can also use vi commands to browse. For example, CTRL-B, CTRL-F, CTRL-D, CTRL-U are useful for browsing the debugger window. These commands work whether or not you escape to vi mode. These vim commands require you to escape to vi mode.
All these commands require you to escape to vi command mode first. When you are done, type a for append or i for insert or other vi commands to return to text insertion mode. You can also simply click on the Prompt softkey. Escape to vi command mode and use the :e command to load a source file. :e filename When the source files are located in multiple directories, you can simply specify the base name alone as long as file names are unique and the appropriate dir commands have been executed. Pressing the Prompt softkey takes you to the command prompt and also updates the source window so that the cursor is left at the point where the program is stopped. To edit a file, kill the process then click on the Edit button. If you do not kill the process, the source file and binaries could get out of sync. Visual Interface for HP WDB preserves the entire session’s transactions so you can browse through these at any time. To edit the command line press ESC to enter vi mode and then use vi commands. You can recall previous commands in history by using [jk^P^N]. Complete command lines using TAB. You can save the contents of the current debugging session, including debugger input/output and program input/output) to a file. To save a session to a file:
The debugger writes the input and output to a file whose name ends in the process ID (pid) of the debugger. If you save the session more than once, the new transactions are appended to the file. |
||||||||||||||||||||||||||||||||||||||||||||||||||||||||||||||||||||||||||||||||||||||||||||||||||||||||||||||||||||||||||||||||||||||||||||||||||||||||||||||||||||||||||||||||||||||||||
|
|||||||||||||